Friday, August 5, 2016

Condominium Dress Continued

I finished my project that I was weaving at the condo.  I thought I would have enough yardage for a dress, but I underestimated - it is going to be a top.  I lost a lot of width by putting in stretchy yarn.  The women at the studio, including my mentor Hiromi, thought it was very creative.


The long, wide portion of the fabric will be the sides and lower portion of the top.


The fabric above will be the bodice.  I wove 5 to 10 rows of red/blue thread alternating with 5 to 10 rows of stretchy yarn.  I looks like a waffle.


This portion of the fabric will be the back of the top.  For this section I wound bobbins with red/blue thread and stretchy thread together.  I looks crinkly, like it needs ironing.  


Awards Ceremony

Today, my last day at Saorinomori, I was awarded my Level 3 and Level A certificates.  Kenzo Jo gathered everyone at the studio together and announced that I passed my two tests.  He said it in English for my benefit and in Japanese for everyone else's benefit.  The certificates were framed and formally presented.  Everyone clapped, it was very sweet!


Washi Paper

Today Hirome was sewing with some of the students.  I stopped by the sewing room for a peek at what they were doing.  Hirome modeled matching pants and a top made out of Washi paper.  The top has a section of Leno (now that I know Leno I am seeing it everywhere).  I was finishing up my projects and Kenzo suggested I wind a warp (good practice).  He generously offered to allow me to leave the warp behind at no charge.  I decided that I wanted to try to wind a warp with Washi paper.


The following pictures are of the warp:


The paper yarn is interesting because it is flat, think thin raffia.  The first portion of the warp is tan, brown, and dark gray.  I changed out the colors as I went along.  I took out some of the brown colors and wound white, light grey, and light blue.  It is about six yards long.  I decided that I liked it so much I wanted to buy it and bring it back home with me.  I bought, at least I think I bought, four or five partially used cones of Washi paper yarn for weft. 

On the upper left hand side of the warping frame is a black cord.  I was using plastic and Kenzo had me swap it out of the black cord.  Kenzo, joking, told me that I need to bring it back to Japan with me the next time I come. LOL.


Shout out to Kenzo and Hirome (pictured above) - It is your turn to come to the US.  You are officially invited to NY/CT.


Thursday, August 4, 2016

Flair Reboot

If at first you don't succeed, try, try again.  The following pictures are of my second attempt at making the fabric flair.  The first two pictures are the project still on the loom.  The third picture is of the finished cloth.  As you can see the thick black band at the top is shorter than the subsequent rows.  Hirome said that she made four flaired panels and sewed them together into a skirt.  Kenzo suggested a cape, for my mother.  I don't think there is enough fabric for that.  I will mull it over and wait for inspiration to hit me.  When in doubt, tell everyone that it will be a top.  It looks like a bath mat in the bottom picture.


Flower Dyeing

In addition to the Bengala dyeing, Hirome dyed four warps with flowers.  She said the flowers collected from one batch were cooked right away.  The warps dyed from the fresh flowers were lighter in color and more yellow.  Two warps were dyed from flowers that were collected but two days passed before they were used to make the dye bath.  The warps dyed in this bath were darker more brown in appearance.

The flower dye baths and warps were heated on hot plates.  They didn not appear to have boiled but were too hot to handle with your hands.  The warps were stirred with wooden sticks.  They were drained, put in a bucket and then spun in an old washing machine.  They were placed on a metal curtain rod to dry.  Kenzo is peeking through the warps looking at the projects drying in the shade.


Bengala Dyeing

Today, I observed a class on Bengala dyeing.  I had seen the dye advertised and read about it on the Internet.  It is Eco-friendly and simple to use.  

Hirome taught the class to two women, and Kenzo's oldest son, Naoto.  The Naoto I've encountered, up until today, is very serious.  Kenzo is very outgoing and gregarious, Naoto, not so much.  I assume part of it is a language barrier, but....

Well, who would have known that Naoto was so funny.  He made silly faces when people were taking pictures and was very congenial.

The participants wrapped rubber bands around their t-shirts, inserted rocks and marbles into their project and tied around them with string, they clamped different shape pieces of wood to their shirts, and made knots around portions of their t-shirts.  


They pre-soaked their projects in "acid?", mixed the dye with water and then placed a portion of their shirt in the dye.  They soaked and squeezed repeatedly until they got the color they wanted.  Then they repeated the process on another section of fabric with a different color.  


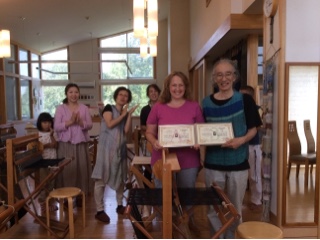
When they were almost done Hirome asked me if I wanted to dye my face towel.  So, I did.  I was happy with the result.  I appreciate being included.  It was fun and I would love to do it again.


New Techniques - Flair


Above the pink section of Leno is my first attempt at making a flair.  The idea behind the flair is to add extra weft to the cloth.  When you lay in the weft you "measure" an extra few centimeters.  Every five centimeters you add an additional 1 to 2 centimeters.   

So, first of all "estimating" weft does not appear to be my strong suit.  Second of all "gradual" is also not in my lexicon.  Third of all - there is no third of all - I cut off the cloth and put it aside for another day.

Fast foward a day - a new day has dawned and I have a plan.  I switched from cotton to wool. The thicker the better.  Then, I got a handy, dandy measuring tape.  I would like to say I got better at estimating as I went along ----but noooooo, I became more systematic at measuring.  I am all about whatever works.  

I will insert a picture of my new "flair" attempt when I am back on wi-fi.

Some times the better part of valor is to stop when you are not successful, reanalyze, and wait for another day when you have more patience.


Tuesday, August 2, 2016

New Techniques - Leno

Maybe I was just tired by the end of my exciting day of testing, but learning "Leno" was mind bending. Kenzo opened the shed took two threads and held them up, then he took two more (about 4 threads away) and crossed them over.  He repeated this four or five times to make the Leno pattern.  

My first attempt had cross overs with a straight thread in between.  It looked okay, but it wasn't what Kenzo did.  My second attempt was to keep the shed down and cross two sets of adjacent threads.  I didn't like the result.  Third attempt was to keep the shed down pick up two threads, skip four, and then pick up two and cross them.  Much better, but still not what Kenzo showed me.


He came back by and showed me again.  Then he showed me four threads alternated with four threads (shed down) - I'd already figured that one out by myself.  


To me it looks like scars.  


This is my favorite section.  I did it Kenzo's way, did a few plain rows in between, and then twisted again.  I think they look like pineapples.  


I got a little carried away by making "pineapples." 

New Techniques - Differential Tension


A wooden dowel is inserted into portion of the warp to provide differential tension.  The ends of the dowel are secured wtih rubber bands placed on the frame of the loom.  The closer the dowel is to the "X" the more tension it provides.  


This is my first attempt at differential tension.  As my son Kyle would say, "meh."  It is okay but not that different than shuttle surfing.

Sooooooo - Kenzo had me make a few adjustments - one was to use a much finer thread - in my case a very fine rayon with sparkles and two was not to leave space between sections.  He also encouraged me to beat the cloth soundly.  I wore away at least five of my edge threads but the result was stunning.


Worth the sacrifice of a few warp threads!


Level A = Adaptive Technology

Kenzo showed me all the adaptive technology he developed for encouraging people with handicaps to learn to weave.  I was blessing my father for encouraging me to take things apart and put them together, because there were a lot of things to bolt on the loom, tie together, and clamp to the loom.  One of the primary principles is to add weight to the back harness so that it falls back into place after beating the cloth.


It is hard to see, but there is a metal rod hooked to the harness that provides weight.


Two clips are added to the reed cap.  They keep the front harness in position so you can push the shuttle through the shed.


This isn't a very good picture, but Kenzo is holding a shuttle shelf.


The shuttle slides along the shelf, through the shed, and is stopped by the blue loop.


The shuttle pictured above can be pushed with a rod held in your mouth or can be pushed along with your foot if you do not have use of your hands.


This metal "box" is clamped to the shelf and helps the weaver wind a bobbin.


Picture above is a cone of yarn next to the bobbin winder.

Other adaptations include a reed hook that changes position for people with visual impairments, a special brake that can be pulled by a cord, two cones taped together that extend a person's range of motion for winding a warp, and a wheel with three prongs for winding the bobbins.  

Weaving with my feet was easier to learn than I thought.  I posted a video on Facebook.  

Hours later, Kenzo removed all the attachments.  I had to put them all back on and demonstrate how to use them.  


Level 3 Skills Test

Saorinomori adheres to the philosophy "do not teach."  Which much like its cousin Montessori is often misunderstood.  When the Saori method was first developed the Jo's travelled all around Japan and the studios did not use the same methods and techniques.  So, Kenzo Jo sought to develop the most logical and efficient ways of weaving.  These are passed from teacher to student.  The skills test is meant to check to see if student is using the proper methods/techniques.  

I was sooooooooo nervous.  The night before the test I had a weaving anxiety dream.  Who knew there was even such a thing.  I dreamed I was trying to weave on the warping board without taking the warp off the board and putting it on the loom. Eeeekkkk!

The test had a written portion and a demonstration portion.  The criteria for testing can be found on the Internet, so I don't think I am giving anything away.  I need to keep practicing sliding the loom closed and open.  I tend to use brute force and lift it to open and close it.  Other than that the test went pretty well.  It is a relief that it is over and I don't need to worry about it any more.  


Monday, August 1, 2016

New Techniques - Shuttle Surfing

The idea behind Shuttle Surfing is to use the shuttle as a beater instead of the beater bar.  You lay in a thread with peaks and valleys like a "sin" curve. Then you change treadles and pack the threads together using the shuttle.  The result looks like waves.  

Empire State Building


Pictured above is a portion of the cloth.  I added white and blue weft in short sections to the pink cloth, floated them diagonally, and continued to add them until I got what looks like a building - in my mind it is the Empire State Building.

New Techniques - Supplemental Threads

I've wound a supplemental warp before to make a ruffled skirt.  Today instead of winding a second warp I added threads directly from cones.  I threaded them through the same heddles as the original warp, threaded them through the reed, and then secured them into the cloth by using the ends as weft.  I used "Super Clips" to add tension, but I've seen other weaver just using the cone for tension.


The vertical "stripes" are individual threads added (supplemented) to the warp.


Pictured above is the back of the loom with the cones and super clips.


New Techniques - X weaving

Pictured below is my attempt at X weaving.  It looks a lot like weaving fringe (see Worcester post).  I used four bobbins and wove them in an out of different sections of the cloth.  Each bobbin was wound with the same four color combination.  It was fun to weave, but I kept dropping my bobbins on the floor.  The small section of X weaving took about four hours to weave.


New Techniques - Open Top Reed

One of my goals for the Japan leg of the trip was to learn new techniques.  The first technique is to use a reed without a cap at the top.  I used a pre-wound black warp.  You take the existing reed out of the reed race and attach it to the harness beam using Kenzo's specially measured cords.  The top of the reed should be even with the top of the eyes of the heddles.

Then you take the reed without the cap and flip it into position.  I originally invisioned that you would have to re-thread the reed, but nooooooo, Kenzo just flipped it from the horizontal to vertical position.  The reed sits on top of a cord and the top is in front of the reed cap.  Voila. You can move the threads from one reed slit to another.  The tricky part is that you need to make sure you don't cross your threads.  Otherwise, your shuttle won't slide along the race.  


Pictured above is the original reed hanging by cords.


Pictured above is the result of using the open top reed.  You keep moving the threads around to open up "holes" and close them back up.  To me it looks like I have a run in my stockings.  


W Weaving

To W weave you take your weft thread and make a series of W's across the width of your warp.  I beat the W's, but to make a huge wall hanging you would make it very loose and keep advancing your warp.  It takes a long time and uses a huge amount of thread.

After removing it from the loom I left about a foot of extra thread.  I tied knots at the very end of each of group of ten threads.  Then I stretched and stretched.  The result is a very cool looking window treatment.